
![]()
Master Data Management Help
Version 8.0.0.490
MASTER DATA MANAGEMENT IN SMARTDATA FABRIC® Configure
Master Data Matching and Merge Rules to Build Master Data Map Master
Data Columns for Querying and Execute Sample Queries A major benefit of SDF is the ability to create and maintain
master data from data across multiple data sources in a distributed manner. SDF
does this without making copies of data in a central location while easily and
seamlessly integrating master data with operational data without putting a
query load on the underlying data sources. This is accomplished by taking
advantage of built-in data federation and link indexing features in SDF. The master data generation process is based on finding
matching attribute values for master data entity attributes. Master data entities
can be simple or complex. Simple entities may have one or two attributes,
whereas a complex entity may have other entities as attributes. An example of a
simple entity in a patient management system can be a contact email address or
phone number. An example of a complex entity is a patient having a name,
address, email, and phone number as attributes. Internally, the master data build process follows these
steps for each entity type configured for master data generation: 1.
Binning entities based on a selected subset of
entity attributes using exact matches of raw or fuzzy versions of the attribute
values. 2.
Linking records within each bin. 3.
A detailed scoring of entities in a bin based on
closeness of attribute values using edit distance algorithms. 4.
Grouping and filtering matches based on a given
cutoff threshold (records in the same group are considered as belonging to the
same entity). 5.
Merging matching entities based on given merge
rules to generate a master record for that entity. The Master Data Management build process is performed at the
Federation level in the EIQ Server Configuration Tool. The initial step in configuring MDM is defining the MDM
entity and its essential entity attributes in terms of business mapped
dictionary column names. These entity attribute columns will be available later
as binning attributes for use during the MDM matching configuration. In order to properly link records for master data
generation, you need to make sure the entity column information is accurate for
the entity and has all of the columns you need. This helps creating links using
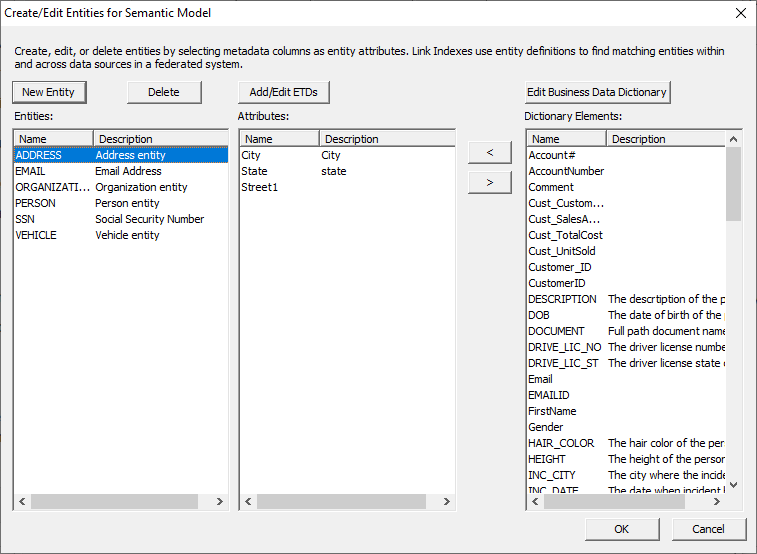
all the necessary attribute data. Go to the ‘Dictionary Mapping’ tab and click ‘Edit Entity
Data’ at the bottom of the window. To define an entity, you need to make sure that the elements
that define a unique field are all in the center pane under the proper entity.
For example, if the combination of the FAMILY_NAME, FIRST_NAME and DOB fields
would define a unique PERSON entity, those three elements become attributes for
the PERSON entity and should be added to the center pane. The following table contains some example entities and the
attributes that populate those entities. Entity Name Attributes PERSON FAMILY_NAME,
FIRST_NAME, DOB ADDRESS CITY, STATE,
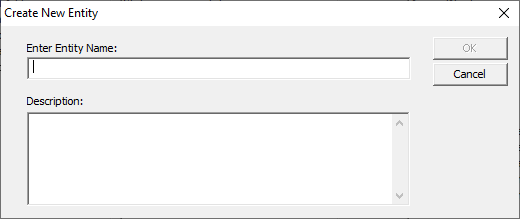
STREET1, STREET2, ZIP EMAIL EMAILID PHONE PHONE SSN SSN To create an entity, click ‘New Entity’. Enter a name for
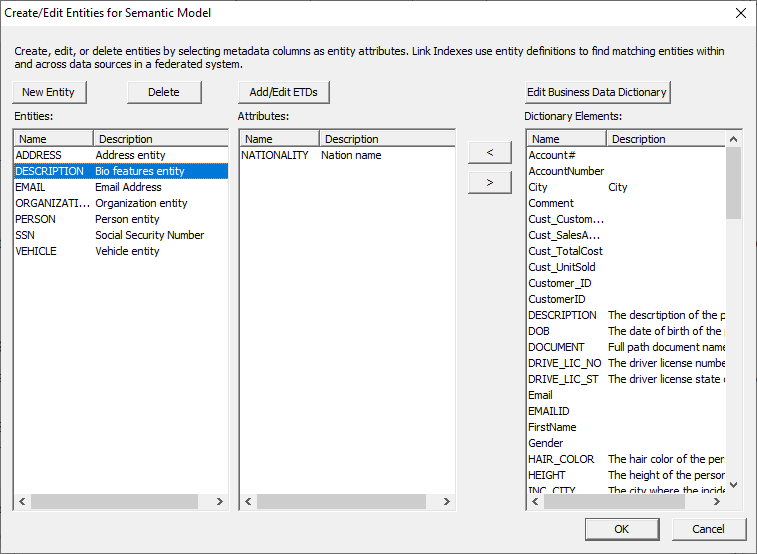
the entity and, if necessary, a description. Entities will auto-populate with one attribute when created.
The selected attributed may not be the an attribute that fits the particular
entity created. Using the ‘Dictionary Elements’ box, search for the
attributes that define the entity you created and add them to the ‘Attribute’
box by selecting them and clicking the left arrow. Remove any incorrect or
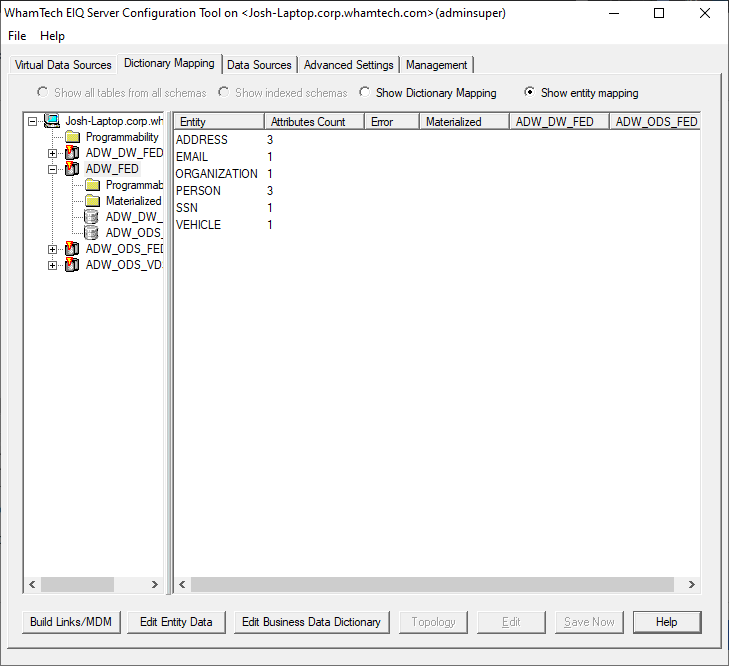
unnecessary attributes by selecting them and clicking the right arrow. Once entities have
been defined, you can now create a Link Index for the Master Data. Under the
‘Dictionary Mapping’ tab: ·
Expand
the server node in the left pane and find a created EIQ Federation Server. ·
Select
the ‘show entity mapping’ radio button. This menu shows the entities
defined, the number of attributes defining those entities, and the remote servers
under the EIQ Federation Server. ·
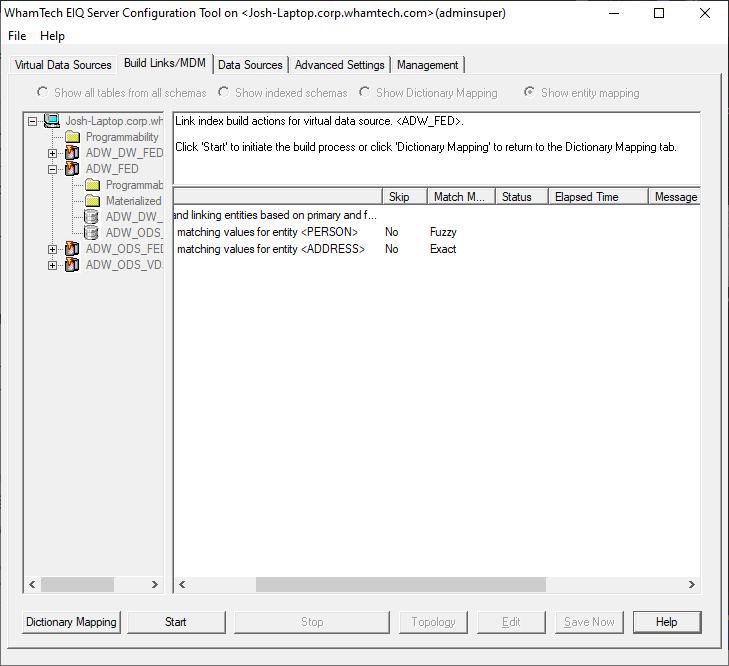
Click ‘Build
Links/MDM’ in the bottom left.. This window will
display every entity being used by the EIQ Federation Server. Only entities
with mapped attributes will appear in this list. We may not want to build links
or MDM for a particular entity listed here because it is not important to the
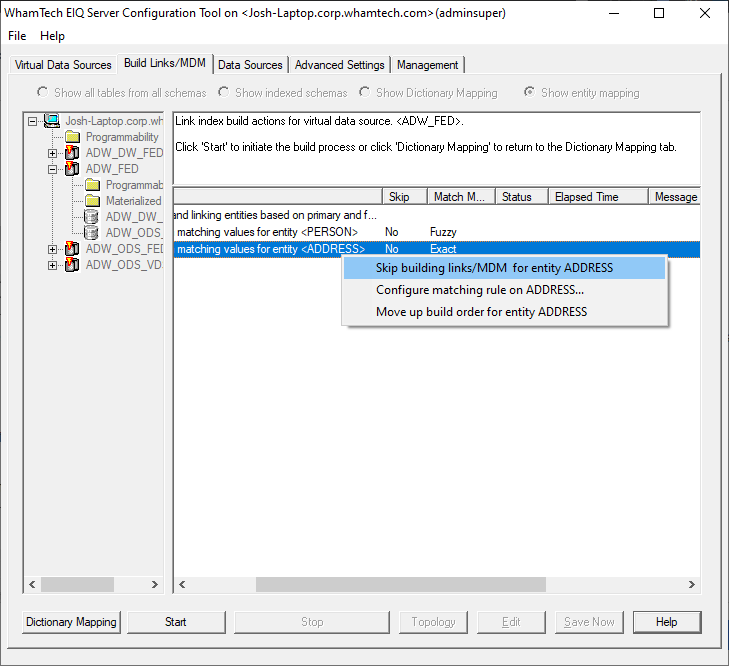
current build. If that is the case: ·
Right-click
the entity and select "Skip building Links/MDM for entity <entity
name>" from the context menu. You may need to apply fuzzy matching to certain fields. Fuzzy matching
is a technique that assists in record linkage. It works with matches that may
be less than 100% perfect when finding correspondences between segments of a
text and entries in a database of previous translations. Rather than having
multiple files for one patient, use it to find similarities between data
sources and match together patient records into one master patient index. ·
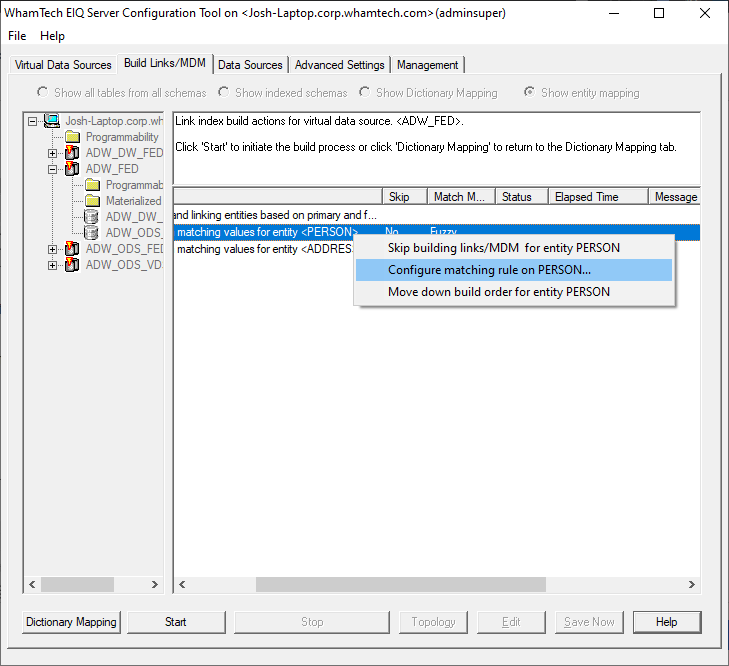
Select
the entity where you need to apply Fuzzy Matching, for example, the PERSON
entity. ·
Right
Click on the Entity Name ·
Select
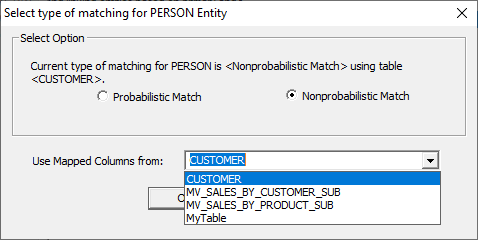
“Configure matching rule on ‘PERSON’” from the context menu. The “Select type of
matching for ‘PERSON’” window will open. There are two types
of matching procedures – Probabilistic and Nonprobabilistic.
These are defined as follows: Probabilistic: Nonprobabilistic: There is also a
drop-down menu that allows the users to select a specific Business View that
has been created. This view will become the basis of the MDM build, and it is
imperative that the view selected has the mapped columns that would benefit a
particular entity. For instance, the CUSTOMER view we see here is comprised of
mapped columns that define customer data, such as first names, last names, dates
of birth, address information, etc., so it would be wise to use this view to
for our MDM attributes. Probabilistic
Matching is still a work in progress. This section will be updated when
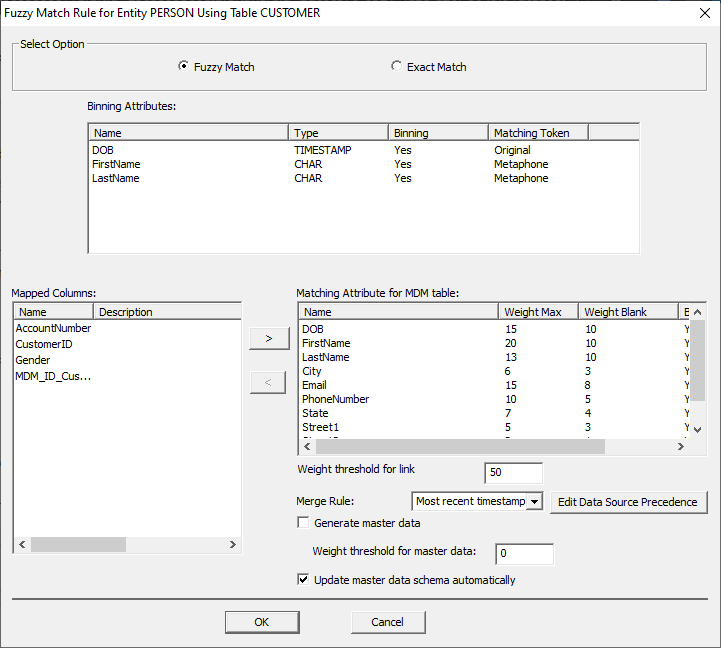
development of the feature is complete. After selecting
"Nonprobabilistic Matching" and the desired
mapped columns view, users will see this window. The tool
automatically populates entity attributes as Binning Attributes. The
"Treat NULL and Space Same" option can be changed by double-clicking
the field and unchecking it. Master Data cannot
be generated through "Exact" using nonprobabilistic
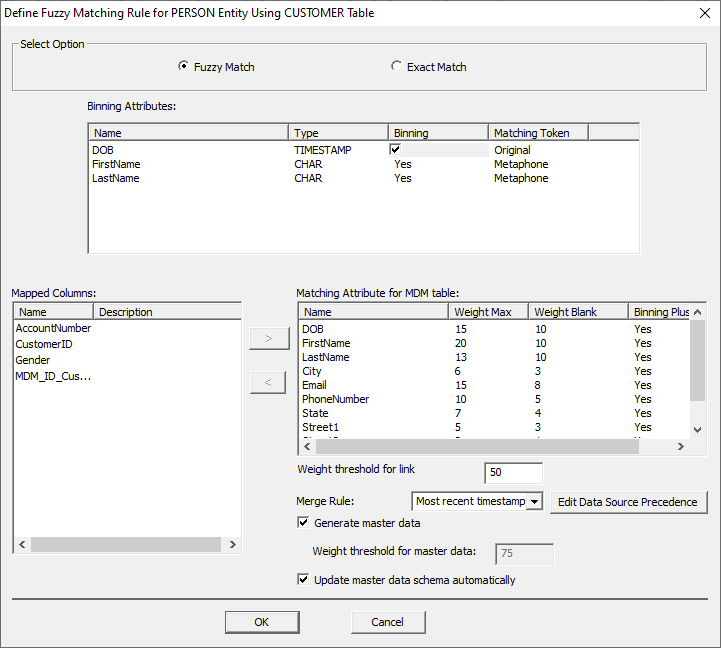
matching. Select the 'Fuzzy Match' option at the top to configure the Master
Data Merging Rules. The Binning
Attribute options change when switching to Fuzzy Match. There's now an option
to select or deselect an attribute as a binning attribute, and there are
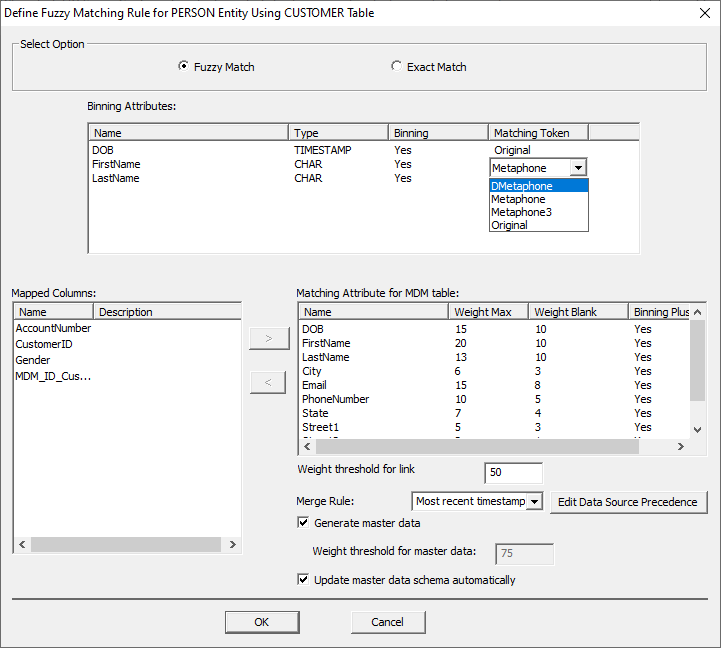
options to change the matching tokens for an attribute. In order to change
the binning option, double-click the field and then check or uncheck the box. In order to change
the matching token, double-click the field and select the desired option from
the drop-down menu. The available
matching tokens are: ·
Original: ·
Metaphone: ·
DMetaphone: ·
Metaphone3: Next, users will
want to add the Matching Attributes for the MDM Table. This should be all the
columns in your master data set you want to merge like CITY, SSN, PHONE, and
etc. Add them by selecting them in the ‘Mapped Columns’ box and clicking the
arrow. To remove an attribute, select it in the ‘Matching Attribute for MDM
table’ box and click the opposite arrow. The "Matching
Attribute for the MDM Table" box then provides a few options for the added
attributes. Header Description Name The name of the
added matching attribute. Weight Max The maximum
weight an attribute will contribute to a match should a match be found. Weight Blank The maximum
weight an attribute can contribute if the field should be found blank. Binning Plus Below the
"Matching Attribute" box, there are a few more configuration options. Option Description Weight Threshold
for link This is the
threshold required for a link to be created between the records. Merge rule This drop down
will determine how records are merged together. For example 'most recent
timestamp' will select the most recent record found. Generate Master
Data Check this box to
generate Master Data, otherwise only links will be created. Weight threshold
for Master Data This is the
weight threshold that must be met for records to be merged for master data. Update Master Data schema automatically Check this box to
update master data when new elements are introduced after the initial
creation. Once all of the
matching a merge rules have been configured, clicking 'OK' will confirm the
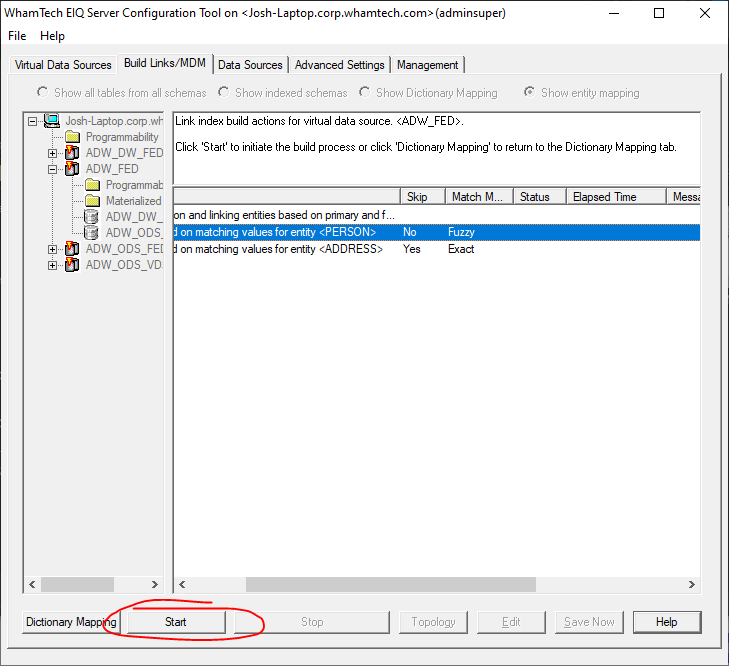
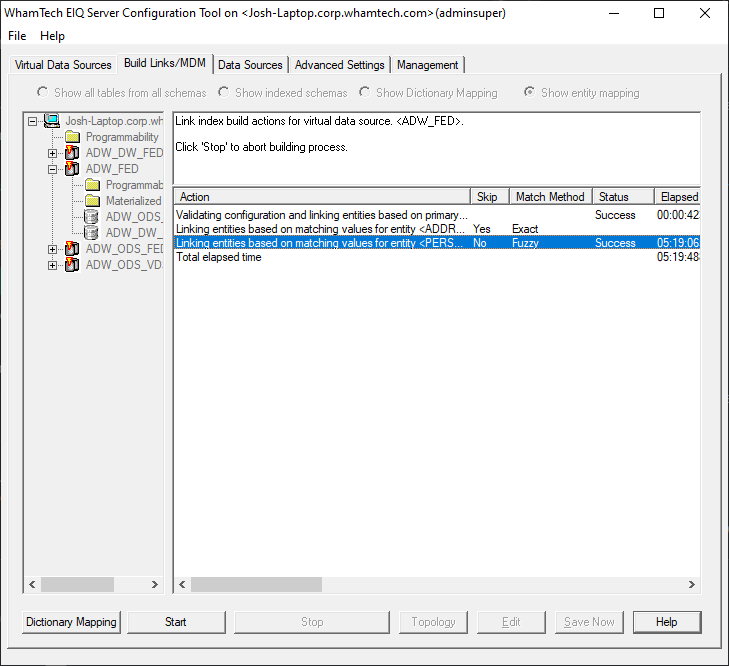
settings. When all of the
matching and merge rules for each entity have either been configured or
skipped, users can select to build Master Data. All you have to do is click
'Start' at the bottom of the window. The match and merge
process will begin. Depending on the size of the data, this could take some
time. Don't be concerned
about the word "merge". Although records from multiple data sources
are being merged together, this is not a write-back or alteration feature. The
actual data source is not being impacted at all. Master Data is built at the
adapter level using the indexes. Indexes are stored in the adapters, and therefore
so is the Master Data. Indexed records are being merged to create master data,
but master data is its own index essentially, and is not changing or altering
anything currently configured. It inserts one derived column into an indexed table,
but more on that later. Users should see
this if Master Data was built successfully. Now that the Master
Data index has been built successfully, the newly generated Master Data needs
to be mapped to a business data view. ·
Click
‘Dictionary Mapping’ in the bottom-left to return to the mapping screen. ·
Go to
any of the adapters that were configured for federation, expand the tree, and
click on the grey node. ·
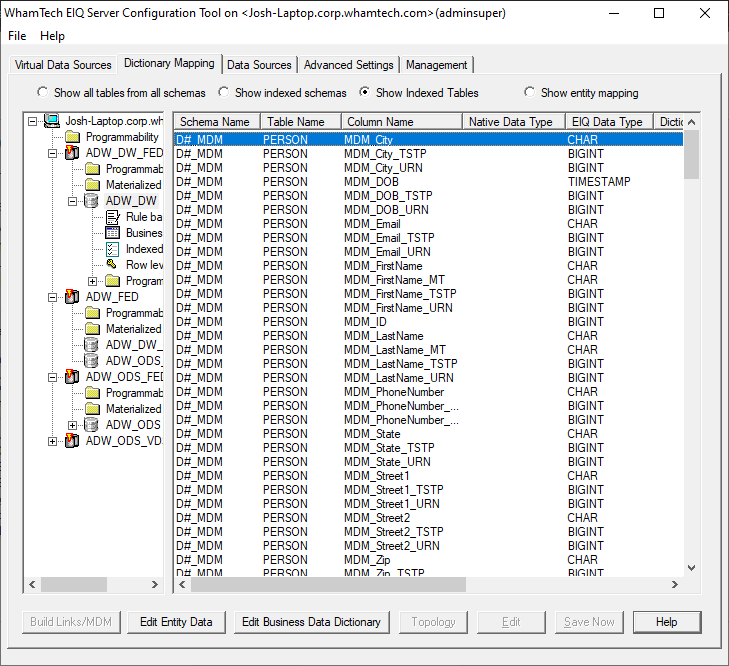
Make
sure ‘show indexed tables’ is selected. The “D#_MDM” schema has been added and a
PERSON table has been created with the selected matching attributes. Building
Master Data has created an entirely new schema and table. The same schema and
table are available in each federated adapter. In real use scenarios, every VDS
that was connected to the EIQ Federation Server with the same entities when the
Link Index/Master Data was built will have the new Master Data schema and
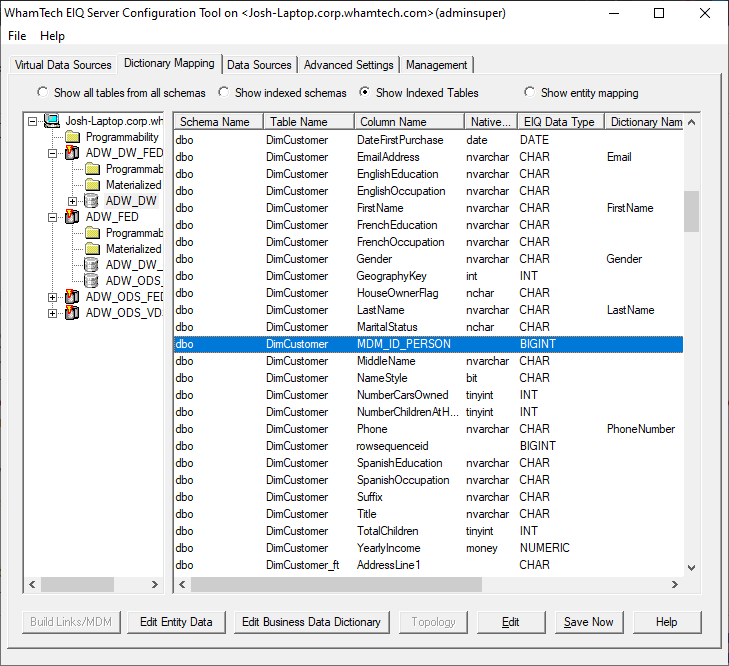
table. Additionally, a derived column as been added to an indexed table called MDM_ID_PERSON.
This column assigns the indexed tables an ID when they are selected for merging
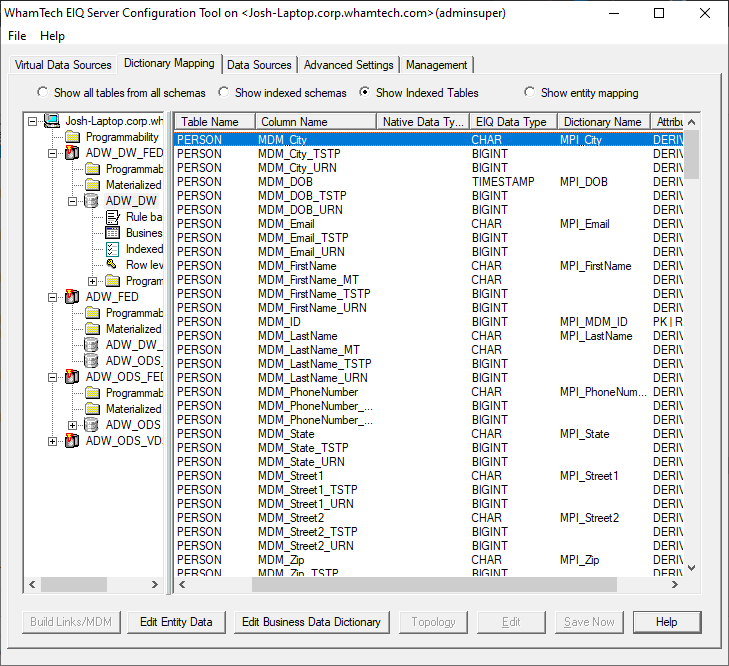
in order to keep track of the data within each individual index. Now
users can add Dictionary Names to their master data columns to apply a business
data view. The procedure is identical to mappings performed in the tutorial
scenarios and other places throughout this user manual. However, users may want
to use a unique naming scheme for master data. Instead of MDM_City, if a user
is constructing a Master Patient Index or Master Customer Index, they may want
to consider using MPI or MCI as an indicator. This is up to the preferences of
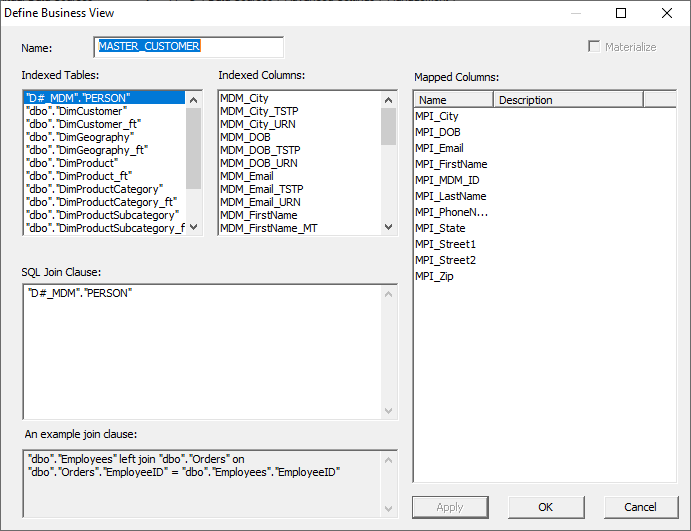
the organization. After
mapping MDM to the business data view, don't forget to create a Business View
in order to query the new Master Data columns. Creating the view is simple.
Just add the MDM schema to the Business View logic pane and click 'Apply'. This
completes the MDM setup and creation process. MASTER DATA MANAGEMENT IN SMARTDATA FABRIC®
Defining Link Entities

Configure
Master Data Matching and Merge Rules to Build Master Data
Probabilistic Matching
Nonprobabilistic
Matching


Building Master Data
Map Master Data Columns
for Querying and Execute Sample Queries
Copyright
© 2023 , WhamTech, Inc. All rights reserved. This document is
provided for information purposes only and the contents hereof are subject to
change without notice. Names may be trademarks of their respective owners.