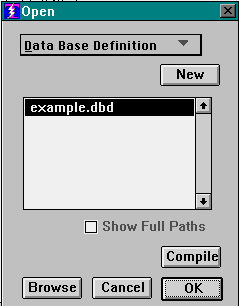

This is the Data Base Definition Dialog. The first thing you need to do is to turn it into the Application Interface Dialog.
Observe that the box that says "Data Base Definition" is a dropdown menu. Click to open that menuand you see this:

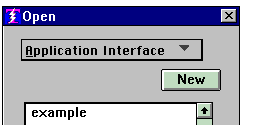
Select "Application Interface" and the Dialog becomes the AI dialog. It is now a listpick showing every AI that you have. They get entered into this list when you compile an AI. The top part of the AI dialog looks like:

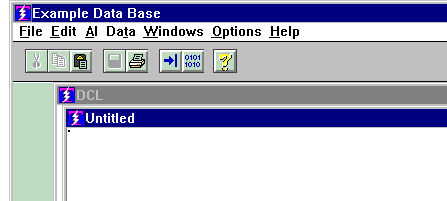
If you wish to recall an existing AI so that you can review or make changes, select it from the list and click OK. We are assuming here that you wish to create a new AI, so click the button that says "New." And you see:

You are in the Text Editor looking at a blank screen titled "Untitled." This is where you are going to key-in an Application Interface. The first (and only required) line of an AI is:
DATA BASE NAME IS data-base-name
Remember that for the most flexibility on where you are going to save the AI it is best to specify a full path name for the data base. You can use the UNC (Universal Naming Convention) when supplying the full path name so that you will not have problems with different workstations having different drive letter mappings.
If you stopped here, thus making this the only line of your AI, the AI would be just like the General Interface (GI). But you would still be better off because now you at least have a source file that you can add RDs to when needed, whereas with the GI you do not have a source file.
The various clauses of the AI and the Record Descriptions are discussed in the topic named Application Interface
, so here we assume that you have just entered the AI and now it is time to save it and compile it.
Saving the Application interface
Once you have entered the AI it is time to save it. When you click the save button on the tool bar you will see the system standard Save dialog.
You are required to name the file you are about to save. The other services provided by the Save dialog allow you to position to any folder you like, or to create a new folder before saving this file. The name you pick is the name that you will be using in the OPEN
command to open the data base.
Once you have saved the file, then it is time to compile
the AI.
Copyright © 2019 , WhamTech, Inc. All rights reserved. This
document is provided for information purposes only and the contents hereof are
subject to change without notice. Names may be
trademarks of their respective owners.