
EIQ Server Query Tool Features
Right-Click Options in Query Pane
Connecting to EIQ SuperAdapter Virtual Data Source
Querying EIQ SuperAdapter Virtual Data Source
Connecting to EIQ SuperAdapter Virtual Data Source in Attach mode
Querying the EIQ SuperAdapter Virtual Data Source in Attach mode
Connecting to EIQ Federation Server
Querying EIQ Federation Server
Connecting to and Querying a TurboAdapter Virtual Data Source
Connecting to a Registered Data Source (REGDB)
Querying the Registered Data Source (REGDB)
Connecting to and Querying EIQ Index Directly
The EIQ Server Query Tool provides features for admins, developers and other users to connect with EIQ Product Servers, execute ad-hoc SQL statements, and view the results. Using the EIQ Server query tool, users can connect to an EIQ Product Server data source by entering the server's IP address or machine name and selecting an available data source. Users also must provide the appropriate login credentials.
EIQ Server Query Tool provides access to three types of data sources:
· Virtual Data Sources (EIQ SuperAdapter, EIQ TurboAdapter, EIQ ConventionalAdapter, EIQ Federation Server)
· Registered Data Sources (REGDB)
· EIQ Indexes.
See EIQ Server SQL Syntax for a detailed description of supported query syntax.
The EIQ Server Query Tool interface allows the user to view multiple open queries (or multiple connections), and their associated result sets. The interface is divided into 3 sections: the query pane, the result pane, and the status bar.
The query pane is used to enter SQL and TQL statements. Multiple statements can be entered in the query pane, but only the first or selected query is executed. You can execute queries by pressing the execute button on the toolbar, 'CTRL + E', or ‘F5’. Query execution is terminated by pressing the stop button on the toolbar or 'CTRL + S'.
The Result Pane contains informative messages and results for a specific query. View messages by selecting the 'Messages' tab. View results by selecting the 'Results' tab.
The Result tab contains the result set associated with a specific query displayed in a grid control. This provides a common interface for reviewing a result set.
The Message tab contains textual information associated with a specific query. The information supplied in the message tab may include error information, result information, or general status information.
The Status bar contains statistical data about a specific query. The data is displayed in four status panes: Current Activity, Isolate Time, Display Time, and Processing Progress.
The current activity status pane displays messages that describe the actions of the executed query.
The Isolate Time status pane displays the amount of time spent isolating the result set for the specified query. The isolate time is millisecond accurate and is formatted MM:SS:msms.
The Display Time status pane displays the amount of time spent retrieving the result set for the specified query and formatting it for the results pane. The display time is also millisecond accurate and is formatted MM:SS:msms.
The Processing Progress status pane displays progress of record processing.
The query tool has a number of options that control the application’s behavior. These settings can be accessed via ‘Tools->Options’. The options include:
This option controls the default action when the application is started. The settings are: Create new query, Empty Workspace, Open last saved query, and Reconnect to last used Database.
These options control the default action when exiting the application and are used to control how an open query is saved. The save query options are: Always, Never, and Prompt. If always is selected, the document name is used as the file name. Additionally, queries can be saved in a single directory or kept with the associated database.
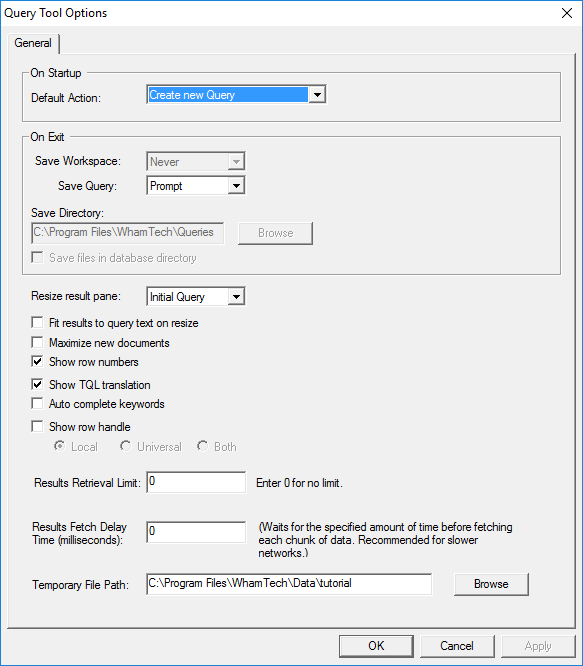
The remaining options are used to control how result sets are displayed.
The query tool also features Most Recently Used Queries. When a query is executed successfully, it is added to the MRU list for that database. The MRU queries are saved query files. If the query file isn't saved, the MRU queries are stored in the registry.
Right-click in the query pane to open a context menu with additional options, such as schema tables, schema columns, set join type, and previously executed queries.
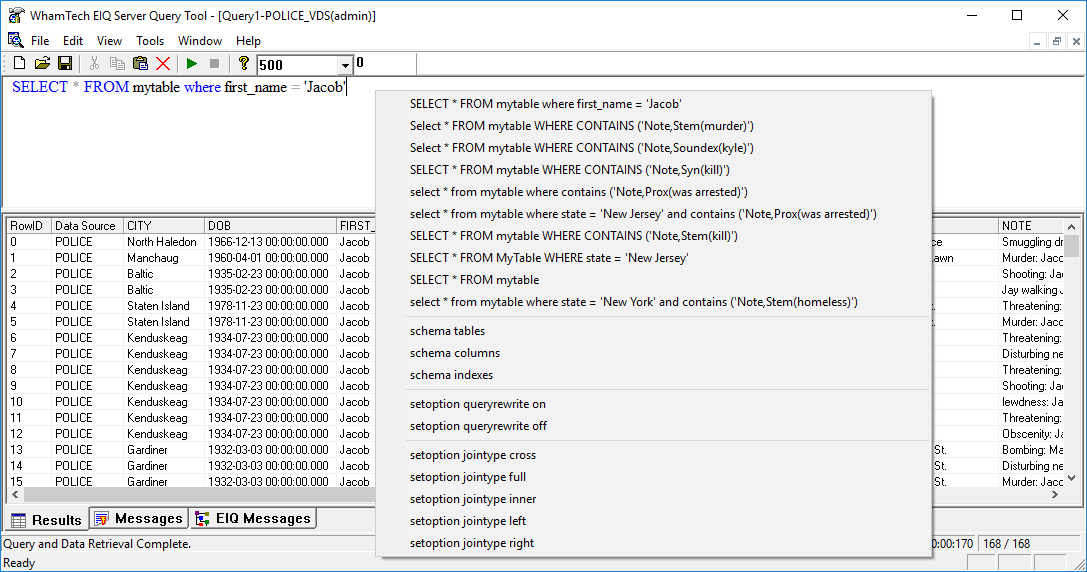
‘Schema Tables’ provides the user with table descriptions, such as table name, schema name, date created, date modified, Record length, and Maximum number of records. If the user connects directly to an EIQ Index, it displays all tables in the index with a description for each table. If the user connects to a Virtual Data Source with a virtual schema view, it displays the description for the virtual schema view (MYTABLE).
This option is provided only when the query tool is connected to a Virtual Data Source or directly to a data source. It allows the user to change the default join type. This modification only applies for the current connection or session. Once the user closes the connection, the join type reverts to the default. The following options are provided in the EIQ Server Query tool:
· Setoption jointype cross
· Setoption jointype full
· Setoption jointype right
· Setoption jointype left
· Setoption jointype inner
Note: The default join type is set in the EIQ Server Configuration Tool under the 'Advanced Settings' tab.
Users have the option to save the results in an HTML file(.html) or text file(.txt). Do this after executing a query. Select "Export Results as" from the File menu.
Step 1: Select 'Create New Query' and click 'OK'.
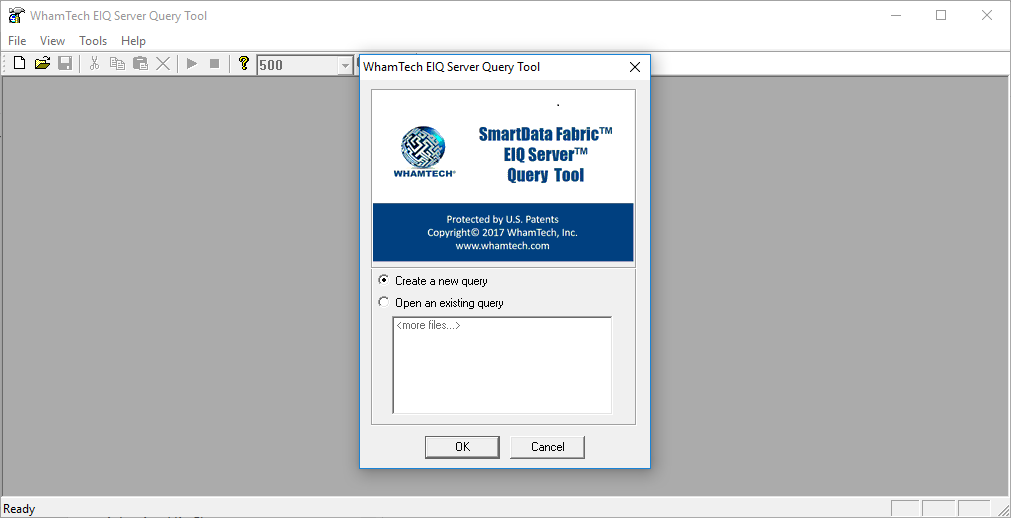
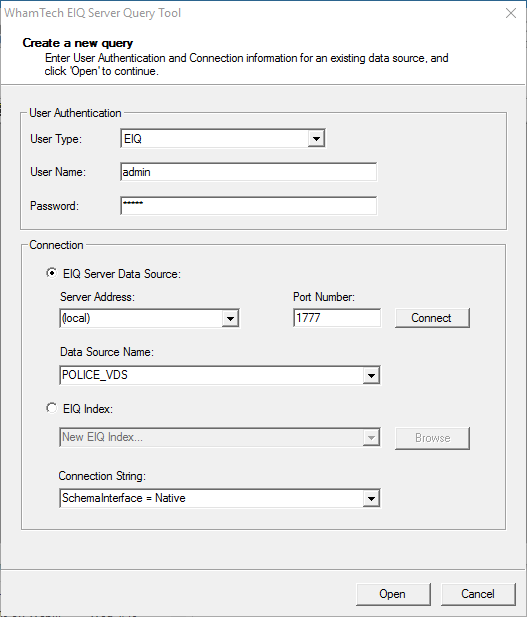
Step 2: Enter the Authentication details. Select or enter the server address where the EIQ SuperAdapter is running and click 'Connect'.
Step 3: Select the 'Virtual Data Source' you want to run queries on. To query on the original data source schema, select 'SchemaInterface = Native' in the Connection String box. To query on the virtual schema view, select 'SchemaInterface = StandardDataModel'. Click 'Open'.
Step 4: Lastly, you can execute your query and view the results for the virtual data source.
When the query tool is connected to an EIQ SuperAdapter Virtual Data Source, users can execute queries only on the virtual schema view defined during the Virtual Data Source definition. The original data source schema is hidden behind the mapped names (SuperSchema). Only fields where metadata column names have been defined are accessible.
Example for SQL Server data source:
select * from mytable;
select family_name, first_name from mytable where state='NJ';
* Here family_name, first_name and state are columns mapped in the SuperSchema.
Step 1: Select 'Create New Query' and click 'OK'.
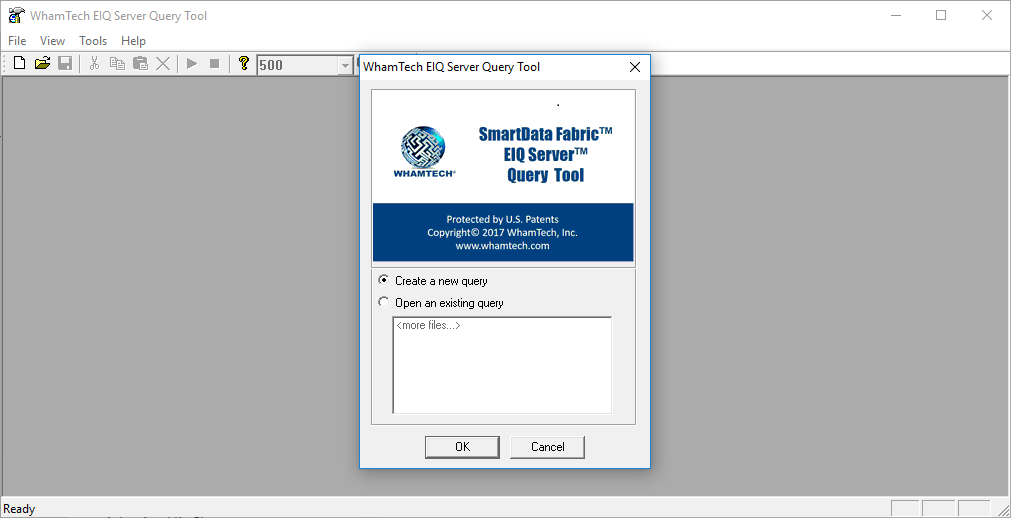
Step 2: Enter or select the server address where the EIQ SuperAdapter is running and click 'Connect'.
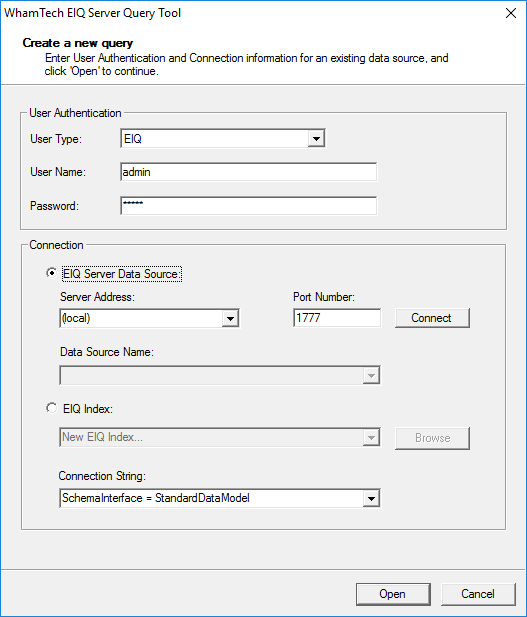
Step 3: Select the 'Virtual Data Source Name' you want to run queries on.
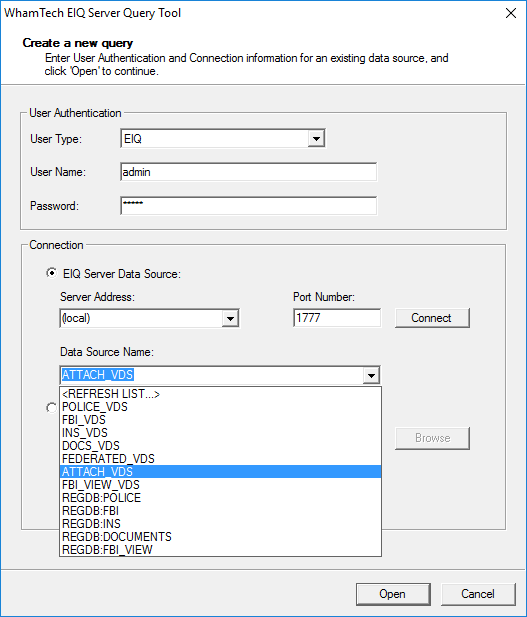
Step 4: To query in Attach mode, select 'SchemaInterface = NativeWithAttach' in the Connection String field and click 'Open'.
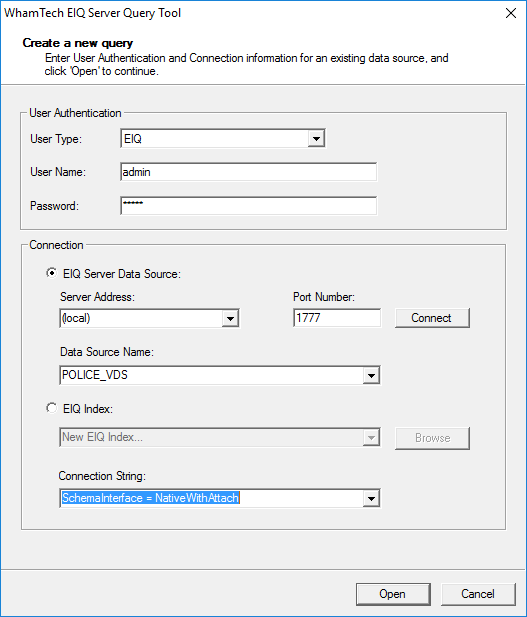
When querying on a virtual data source in attach mode, users can query on tables from different data sources as if they were from same data source. Queries should be based on the original data source table and column names; not on a SuperSchema mapping.
Example:
select * from loperson_alias;
Any kind of joins between two tables should be explicitly specified in the query.
For example: SELECT * FROM person fbi JOINloperson_alias pol
ONfbi.per_id=pol.person_id WHEREfbi.per_familyname ='lu'
If a SuperSchema mapping has been specified, the user can query on the virtual schema view by selecting the Connection String 'SchemaInterface = StandardDataModelWithAttach'.
For example: select * from mytable
Step 1: Select 'Create New Query' and click 'OK'.
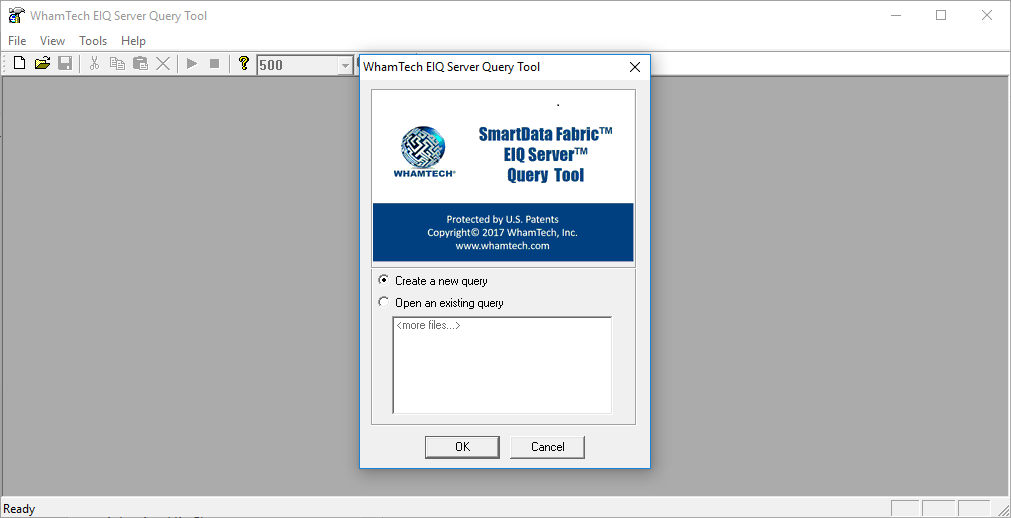
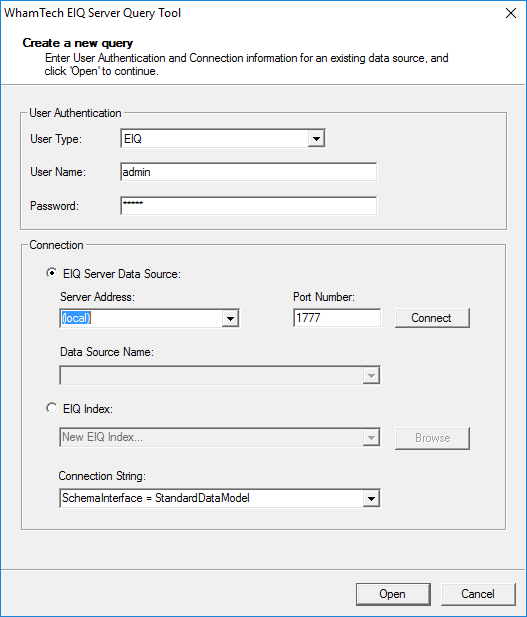
Step 2: Select from the combo-list the server address where the EIQ Federation Server is configured, and click on 'Connect'.
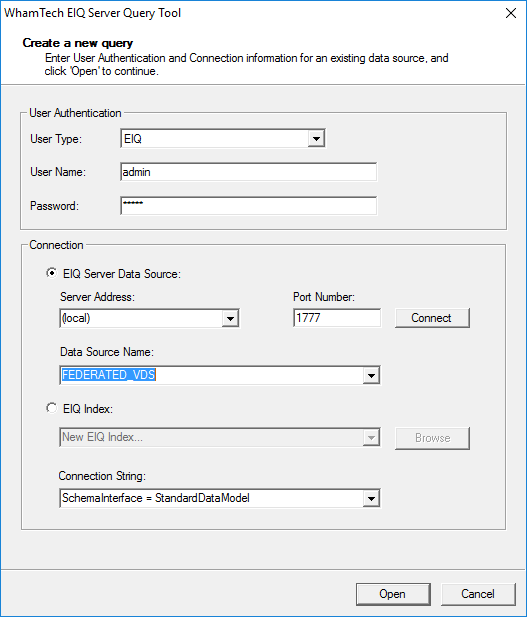
Step 3: Select the 'Virtual Data Source Name' you want to run queries on.
To query on the data source schema, select 'SchemaInterface = Native' in the Connection String box.
To query on the virtual schema views created for the data sources connected to the Federation Server, select 'SchemaInterface = StandardDataModel'.
When the query tool is connected to an EIQ Federation Server with a SuperSchema mapping, users can execute queries only on the virtual schema view defined during the EIQ Federation Server definition. Only fields where metadata column names have been defined are accessible, hence, users should have thorough knowledge of which data source columns are associated with which metadata column names. Queries get forwarded to the other EIQ Servers like more EIQ Federation Servers or EIQ SuperAdapters.
Step 1: Select 'Create New Query' and click 'OK'.
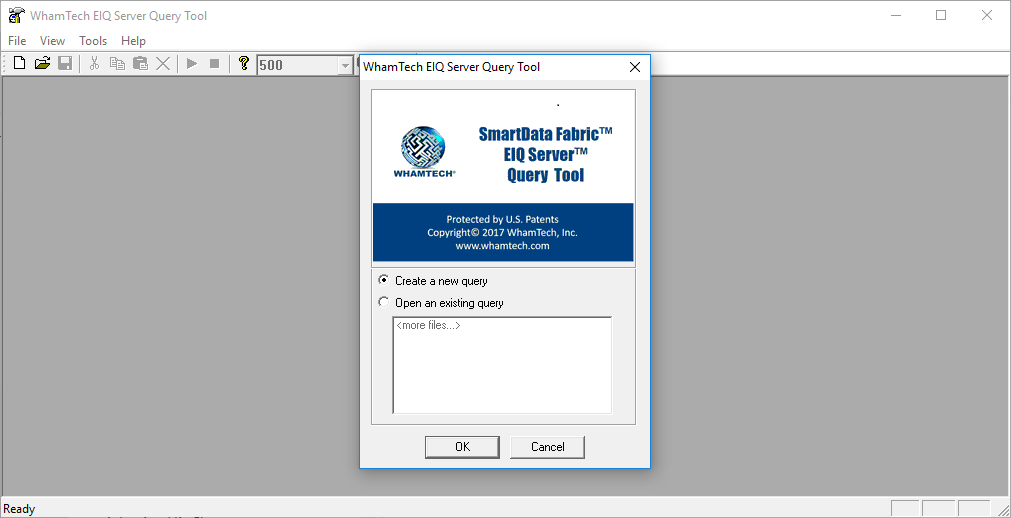
Step 2: Enter the Authentication details. Select the server address where an EIQ TurboAdapter is running and click 'Connect'.
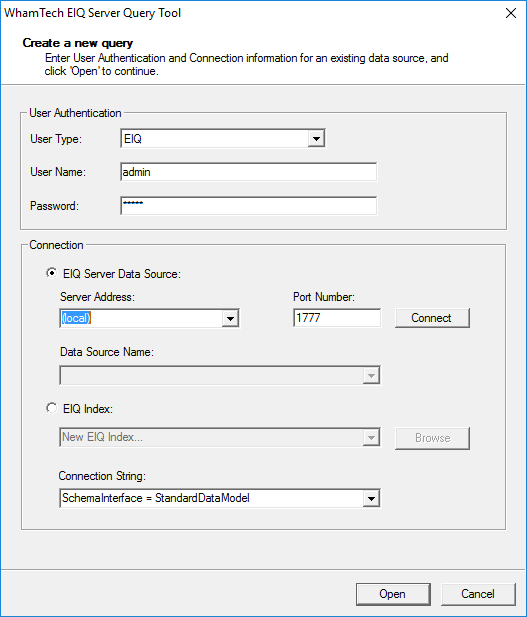
Step 3: Select the 'Data Source Name' you want to run queries on. The string in the connection string box should be 'SchemaInterface = Native'. Click 'Open'. The queries should reflect table and column names in the original data source schema because there is no SuperSchema defined for the TurboAdapter VDS.
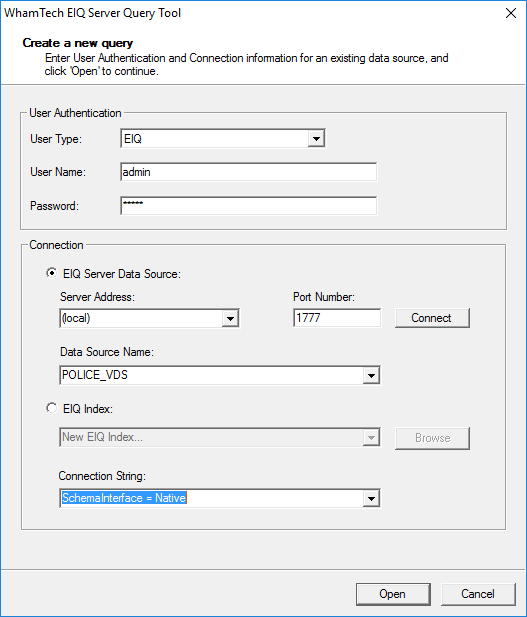
Step 4: Lastly, you can execute your query and view the results for the TurboAdapter virtual data source.
User can connect to a registered data source (the data source registered in EIQ Server Configuration Tool->Data Sources tab) by entering the server IP address or machine name and selecting "REGDB:registeredDatasourceName" in the Data Source Name field. Querying the data source directly is discussed below.
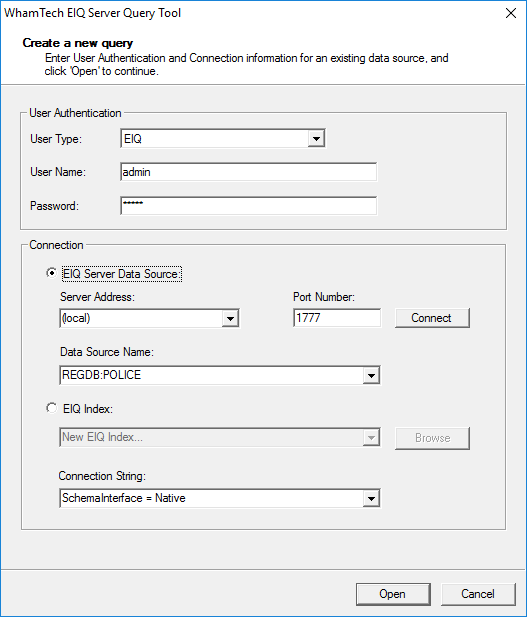
When the query tool is connected to a data source directly, all queries are passed on to the native data source for execution. Queries should be formed according to original data source schema (table names, column names etc.) and the query syntax should reflect names in the original data source system. This differs from Oracle to SQL Server and other databases.
Example for SQL Server data source:
Select * from loperson;
Note: This is a typical SQL query which runs in SQL Server directly. column names, table names used here are the actual names from data source.
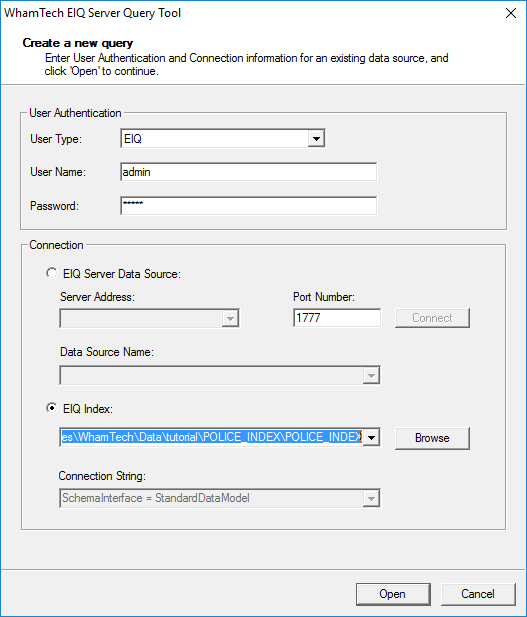
Admins and developers can connect to an EIQ Index by entering the whole path to the .DBD file. Connecting directly to EIQ Indexes is strongly discouraged and should be avoided.
If users connect to an EIQ Index they can run queries on the EIQ Index tables only. No metadata column names or virtual schema view related queries are recognized by the query tool.
Copyright © 2019 , WhamTech, Inc. All rights reserved. This
document is provided for information purposes only and the contents hereof are
subject to change without notice. Names may be
trademarks of their respective owners.