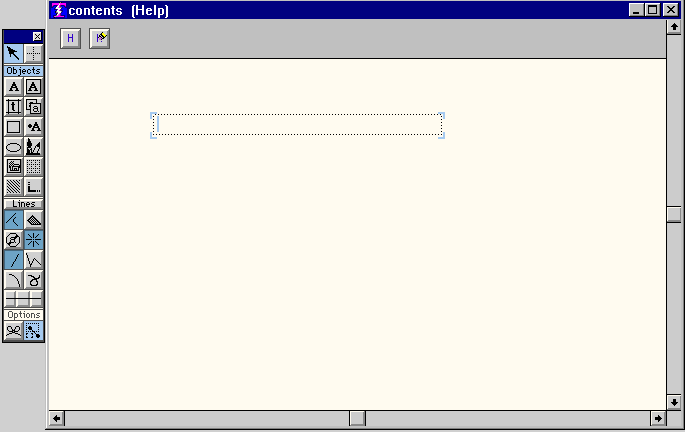

You see that you have a Text Box in the middle of an otherwise blank screen. You are going to create the help page(s) inside that Text Box. Notice that the Text Box is not very wide. You need to fix that.
You want to stretch the Text Box so that it has the same width as the help viewing area.
But the width of the help viewing area is dependent on the resolution under which you are running. So invoke a help screen and measure its width with a ruler. Then stretch Text Boxes to that constant width each time you begin a new help definition. If the help screens are right for your resolution, they will be right for all other resolutions. If you ever change your pixel resolution, remeasure.
To stretch a Text Box, get the "resize" cursor in the lower right corner of it and drag it out to the correct width. Now type in your help page. As you type, it automatically word wraps when you get to the edge.

Look at Thunderbolt's CONTENTS page and some of the other pages to get some ideas as to what you might do.
Hyper Linking
To establish a hyperlink, select a word or phrase (to select, drag your cursor across the desired word or phrase) and then click on the H button in the def-specific palette. A balloon will open to the right, where you can enter the name of the page (definition) to go to if the user clicks on the selected word or phrase. The selected word(s) will show up in blue to indicate that a hyper link is established.
Of course, once you have typed in a definition name in the hyperlink balloon you must ensure that that definition exists. If it currentely does not, go DEFINE it.
Hiding and Showing the Hyperlinks
When you establish a hyperlink you will see a line stretch from just under the rightmost character of the selected word or phrase to the balloon where you enter the page name. When you have lots of hyperlinks on the same page the page gets difficult to look at because there are so many lines and balloons. So there are two cursors that are handy to know about:
TheHide cursor

TheShow cursor

When the balloon is showing, if you move the mouse to just under the last character of the selected text (right at the beginning of the line) you will see the Hidecursor. Click once and the line and balloon are hidden. They are still there, it just makes your document easier to look at since it is not so kludged up with lines and balloons.
Suppose you have hidden all of your hyperlinks, and now you want to look at one in order to recall the name that the link goes to. You still know what words are linked because they appear in blue. To reveal the link, move your mouse around under the last character of the blued text until you see the Showcursor, and click once.
Invoking HELP
The user invokes help by pressing function key F1, or by clicking on
For either the function key or the button the HELP that is invoked is the currently posted HELP file and the currently posted HELP definition name.
If you have provided for it, another way your user can invoke help is by pressing the button labeled HELP on any LISTPICK
or CHOOSE
menus.
If you are in DCL, you can also invoke help by typing the HELP command:
HELP -Use currently posted HELP filename and
starting point (same as pressing F1)
HELP
defname -Use currently posted HELP filename and
the specified help definition name
The MODE HELP command
The complete syntax of the MODE HELP command is:
MODE HELP user-help-file.HHH [help-definition-name]
MODE HELP OFF
The MODE HELP command establishes the specified file as the current HELP file. Note that a help file name must end in .HHH. Also, this file is assumed to be in the same folder as your Interface. If not, you must supply the full path filename.
Use the MODE HELP command to switch from Thunderbolt's HELP to your own, and/or to post specific help pages as the ones to display if the user requests help. To switch back to Thunderbolt's help, use MODE HELP OFF.
If you do not supply a help definition name, the one named CONTENTS is the default assumption.
Establishing your HELP upon entry into your application
Use the MODE HELP command in your Application Procedure
in order to auto- matically establish your HELP upon entry into your application.
Specifying specific help pages in your procedures
You can make your application help be context sensitive. The best way to do that is to use the MODE HELP to post specific helps just before any screen or dialog commands, then use it again to repost your CONTENTS definition just after these commands.
How do I get screen shots into my help pages?
Copyright © 2019 , WhamTech, Inc. All rights reserved. This
document is provided for information purposes only and the contents hereof are
subject to change without notice. Names may be
trademarks of their respective owners.